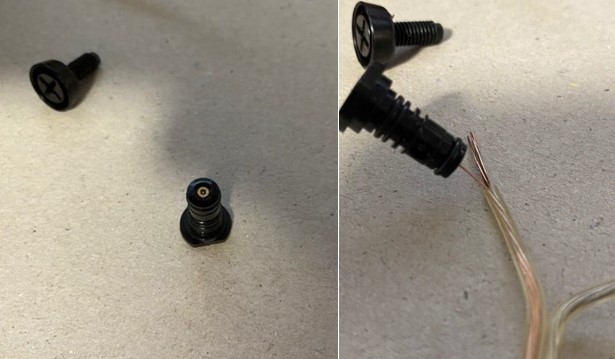
A plugged pilot jet can create an idle issue that may act like a choke issue. If you believe a plugged pilot jet is affecting the performance of your generator, follow the cleaning process in this article. This process includes removing the pilot jet and jet lock screw, pictured below.
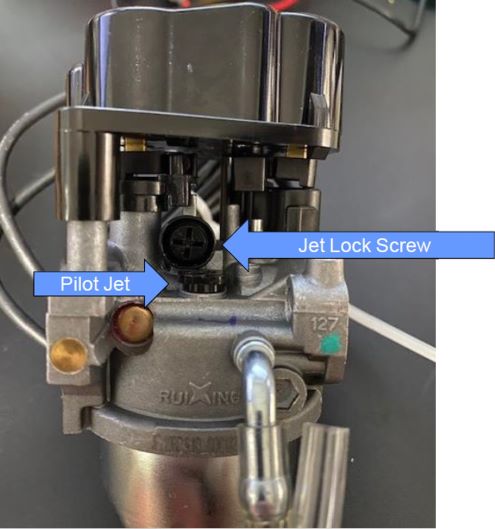
Required Tools and Supplies
- Safety Glasses
- Nitrile Gloves
- Phillips Screwdriver
- Prying Tool
- Fine Wire
Always wear safety glasses and nitrile gloves when servicing your Polaris generator.
1. Ensure the generator is on a flat, level surface.
2. For P2000i and P3200iE models, use a Phillips screwdriver to loosen the two maintenance cover fasteners. Remove the cover.
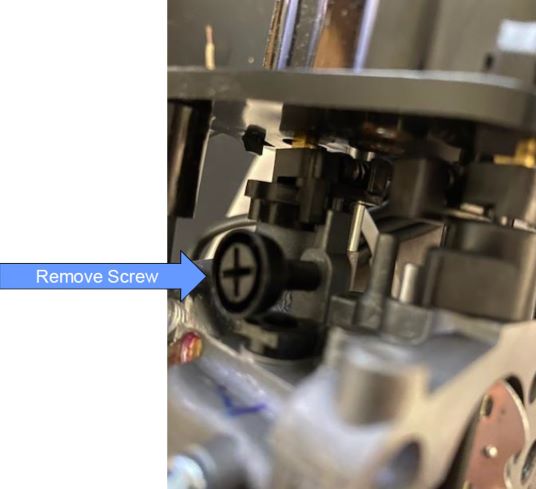
3. Remove the plastic jet lock screw with a Phillips screwdriver. Use caution when removing the screw.
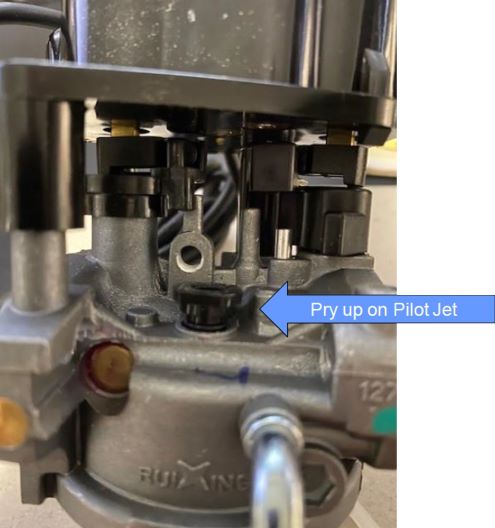
4. Carefully pry up on the pilot jet.
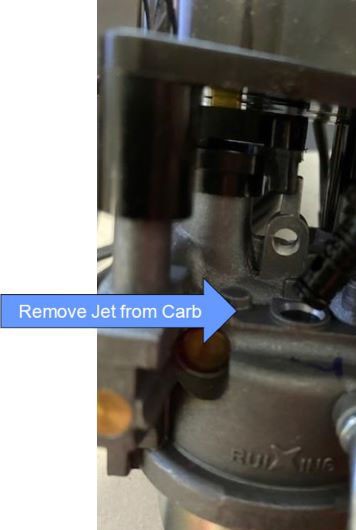
5. Remove the jet from the carburetor.
6. Use a fine wire to clean debris from the jet. DO NOT use compressed air to blow the debris out. If needed, clean with carb cleaner spray.
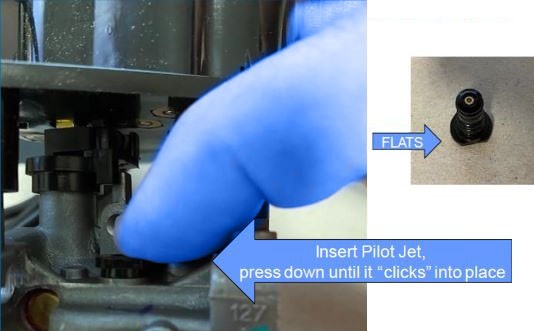
7. Using light pressure, insert the pilot jet and press down until it clicks into place. The pilot jet will only fit with the flats lined up with the carburetor body.
8. Install the lock screw and tighten until snug.

9. On P2000i and P3200iE models, reinstall the maintenance cover and tighten the fasteners until fully seated.
10. Finally, start the generator and verify proper operation. Warning: Never operate a generator indoors. Generator exhaust contains carbon monoxide vapors, and exposure can result in severe injury or death.
If cleaning the jet did not resolve the issue, the carburetor assembly may need to be replaced.
For more information, see your authorized Polaris Dealer. Find a dealer near you with the Dealer Locator.
Maintenance procedures and specifications can be found in your Owner's Manual.
To find diagrams and replacement parts, use the online parts catalog.
Unless noted, trademarks are the property of Polaris Industries Inc.
© 2022 Polaris Industries Inc.


