

Some Polaris off road vehicles are equipped with the Dual Sweep Analog/Digital Gauge. It features a 4-inch LCD Rider Information Center.
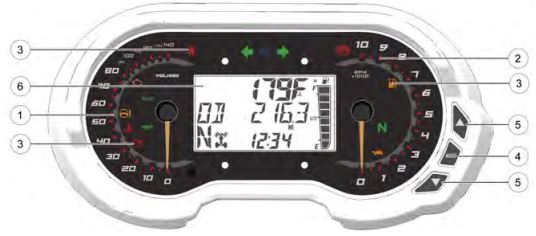
The gauge features a speedometer (1), tachometer (2), indicator lamps (3), MODE button (4), toggle buttons (5) and Rider Information Center (6).
The speedometer displays vehicle speed in either miles per hour (mph) or kilometers per hour (km/h).
The tachometer displays engine speed in revolutions per minute (RPM).
Press and hold the MODE button (4) to enter or exit the settings menu. Press and release the MODE button to cycle through Area 1 modes and to select an item.
Press and release either toggle button (5) to cycle through the options menu or Area 2 modes. Press and hold either toggle button to reset an item.
With the ignition key OFF, pressing the MODE button or either toggle button will power up the Ride Information Center for 10 seconds to allow viewing of the odometer and the clock.
Indicator Lamps
See the below table for more information on the 12 indicator lamps that can illuminate on the gauge.
| Icon | Function |
 | When standard mode is selected, vehicle speed displays in miles per hour. |
 | When metric mode is selected, speed displays in kilometers per hour. |
 | The Check Engine indicator appears if a fault occurs. Do not operate the vehicle if this warning appears. Serious engine damage could result. Your authorized Polaris Dealer can assist. |
 | The Check Battery warning usually indicates that the vehicle is operating at an RPM too low to keep the battery charged. It may also occur when the engine is at idle and high electrical load (lights, cooling fan, accessories) is applied. Drive at a higher RPM or recharge the battery to clear the warning. |
 | The EPS Warning indicator (if equipped) illuminates briefly when the key is turned to the ON position. If the light remains on, the EPS system is inoperative. See your Polaris Dealer as soon as possible for repair. Continued operation could result in permanent damage to the EPS unit and increased steering effort. |
 | The Engine Hot lamp illuminates to indicate an overheated engine. If the indicator flashes, the overheating condition remains and the system automatically will reduce engine power. |
 | The Neutral lamp illuminates when the transmission is in neutral and the ignition key is in the ON position. |
 | The Helmet/Seat Belt lamp is a reminder to the operator to ensure all riders are wearing helmets and seat belts before operating. The driver's seat belt is equipped with a seat belt interlock. Vehicle speed will be limited to 15 mph (24 km/h) if the seat belt is not secured. |
 | The High Beam lamp illuminates when the headlamp switch is set to high beam. |
 | The Park Brake lamp illuminates when the park brake is applied (if equipped). |
 | The Low Fuel lamp illuminates when the fuel level in the fuel tank is low. |
 | Information about the Speed Key (optional accessory) is provided in the accessory kit. |
Rider Information Center
The Rider Information Center is located in the instrument cluster. All segments will light up for 1 second at startup. If the instrument cluster fails to illuminate, a battery over-voltage may have occurred, and the instrument cluster may have shut off to protect the electronic speedometer. If this occurs, your Polaris Dealer can provide proper diagnosis.
The information center is set to display standard units of measurement and a 12-hour clock at the factory. To change to metric and/or a 24-hour clock, hold the MODE button and cycle to the clock menu. Use the directional arrows to change the clock settings.
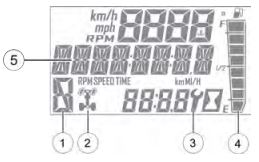
| Item | Indicator | Description |
| 1 | Gear Indicator | This indicator displays gear shifter position. H = High Gear L = Low Gear N = Neutral R = Reverse Gear P = Park - = Gear Signal Error (or shifter between gears) |
| 2 | AWD Indicator | This indicator shows whether 2x4, AWD or TURF Mode is active. |
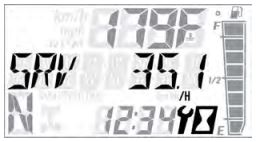
| 3 | Service Indicator | A flashing wrench symbol alerts the operator that the preset service interval has been reached. Your Polaris Dealer can provide scheduled maintenance. See below for resetting instructions. |
| 4 | Fuel Gauge | The segments of the fuel gauge show the level of fuel in the fuel tank. When the last segment clears, a low fuel warning is activated. The outline of the fuel display will flash. Refuel immediately. |
| 5 | Speed Limitation (if equipped) | This vehicle may be equipped with a maximum speed limitation function. This would be displayed on the screen as "LIM" followed by the speed. For example, "LIM 30." |
The Rider Information Center contains three areas that display more information.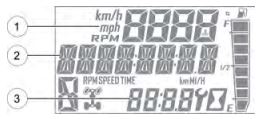
| (1) Area 1 Modes | Description |
| Engine Temperature | Temperature of engine coolant |
| Vehicle Speed | Speed of vehicle |
| Tachometer | Engine speed (RPM) |
| (2) Area 2 Modes | Description |
| Odometer | The odometer records and displays the distance traveled by the vehicle. |
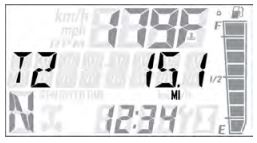
| Trip Meters (T1/T2) | A trip meter records the distance traveled by the vehicle if reset before each trip. To reset, see below. |
| Engine Hours | Total hours of engine operation since manufacture. |
| Service Hours | A flashing wrench symbol indicates that the preset service interval has been reached. To reset, see below. |
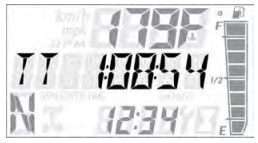
| Trip Time | Time length of vehicle operation since the mode was last reset. TT will illuminate on the display with trip time is shown. |
| (3) Area 3 Modes | Description |
| Clock | The clock displays time in a 12-hour or 24-hour format. To reset, see below. |
Gauge Settings Menu
Press and release the MODE button to cycle through the Area 1 modes until the desired default mode displays. See the above tables for more details.
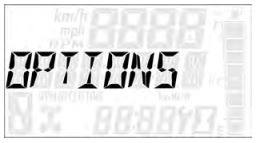
Press and hold the MODE button to enter the settings menu. The Options screen will display for a few seconds.
1. Press and release either toggle button to cycle to the desired option.
2. Press MODE to select the options.
3. Press either toggle button to cycle to the desired setting.
4. Press MODE to save and exit to the settings menu.
5. Press and hold the MODE button to exit the settings menu.
Backlight Color
The information center backlight can be set to either blue or red.
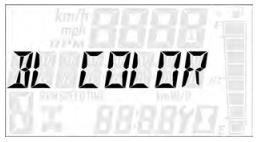
1. Press and hold the MODE button to enter the settings menu.
2. Press either toggle button to cycle to the BL COLOR option. Press MODE to select.
3. Press either toggle button to cycle to the desired setting.
4. Press MODE to save and exit to the settings menu.
Backlight Brightness
The information center backlight brightness can be adjusted.
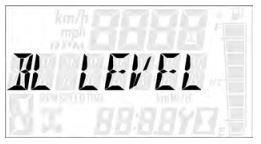
1. Press and hold the MODE button to enter the settings menu.
2. Press either toggle button to cycle to the BL LEVEL option. Press MODE to select.
3. Press the UP button to increase brightness. Press the DOWN button to decrease the brightness.
4. Press MODE to select and exit to the settings menu.
Clock
The clock must be reset any time the battery has been disconnected or discharged.
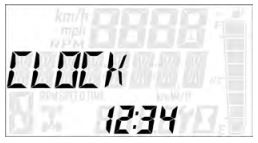
1. Press and hold the MODE button to enter the settings menu.
2. Press either toggle button to cycle to the CLOCK option. Press MODE to select.
3. Press either toggle button to cycle to the desired setting (12H or 24H). Press MODE to select.
4. Press either toggle button to change each segment of the clock. Press MODE to accept a change and advance to the next segment.
Display Units
The information center can be set to display either standard or metric units of measurement.
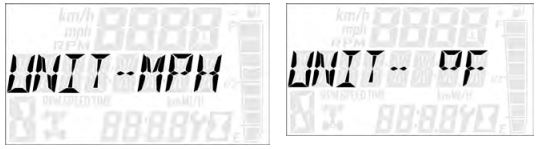
1. Press and hold the MODE button to enter the settings menu.
2. Press either toggle button to cycle to the desired option (distance, temperature or volume). Press MODE to select.
3. Press either toggle button to cycle to the desired setting.
4. Press MODE to save and exit to the settings menu.
Trip Meter
Use a trip meter to track the distance traveled during a specific trip or period of time. Reset the meter to zero before traveling.
1. Press either toggle button to cycle to the desired trip meter option (T1 or T2).
2. Press and hold either toggle button until the meter resets to zero.
Trip Time
Use a trip time meter to track the travel time during a specific trip. Reset the meter to zero before traveling.
1. Press either toggle button to cycle to the trip time option (TT).
2. Press and hold either toggle button until the meter resets to zero.
Programmable Service Interval
The service interval counter is programmed to 25 hours at the factory. As hours of engine operation increase, the counter decreases. The wrench icon will flash for about 10 seconds when the counter reaches zero and each time the key is turned on thereafter until the counter is reset.
When viewing service hours, the wrench and hourglass icons will illuminate as shown below. A flashing wrench provides a reminder to perform routine maintenance. Refer to the Periodic Maintenance Chart in your Owner's Manual for the recommended service intervals.
Use the following procedure to reset or change the service interval.
1. Press and hold the MODE button to enter the settings menu.
2. Press either toggle button to cycle to the Service Hours option. Press MODE to select.
3. Press MODE to reset the existing value and exit or press either either toggle button to change the value. Press MODE to save and exit to the settings menu.
Engine Error Codes
The error screen displays only when the CHECK ENGINE indicator is on or when it goes on and off during one ignition cycle. Error codes are not stored. When the key is turned OFF, the code and message are lost but will reappear if the fault occurs after restarting the engine.
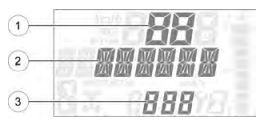
- (1) Failure Mode Indicator (FMI)
- (2) Suspect Parameter Number (SPN)
- (3) Code Count
If the CHECK ENGINE lamp or the EPS lamp illuminate, retrieve the active error codes from the display.
1. Press and hold the MODE button to enter the settings menu.
2. Press either toggle button to cycle to the DIAGCODE option. Press MODE to select.
3. More than one diagnostic code may be present. Press the toggle UP button to see if more codes are present. Press MODE to select a code. If the displayed code is an engine fault code, the CHECK ENGINE lamp will blink. If the displayed code is an EPS fault code, the EPS lamp will blink.
4. Record the three numbers displayed, as shown in the diagram above.
5. Press MODE to exit to the settings menu.
Your Polaris Dealer can help you translate the codes displayed in your gauge.
Among the models the Dual Sweep Analog Gauge is found on is the RZR Pro XP. For more on the gauge, watch the following video.
For more information, see your authorized Polaris Dealer. Find a dealer near you with the Dealer Locator.
Maintenance tips, procedures and specifications can be found in your Owner's Manual.
YouTube® is a registered trademark of Google LLC
Unless noted, trademarks are the property of Polaris Industries Inc.
© 2022 Polaris Industries Inc.


